Why Tape Back Your Client's Lashes?
Before we dive into the step-by-step process, let's discuss why you should tape back your client's lashes. When applying lash extensions, it's important to isolate each individual natural lash. This can be a time-consuming process, especially if your client has long or thick lashes. Taping back your client's lashes makes it easier to see and access the natural lashes, allowing you to apply lash extensions more quickly and efficiently.Step-by-Step Guide to Taping Back Your Client's Lashes
Here's how to tape back your client's lashes in eight easy steps:Step 1: Comb Through Your Client's Lashes
Before you begin, make sure your client's lashes are clean and free of any makeup or debris. Use a lash comb to gently separate and straighten the natural lashes.
Step 2: Dispense a Piece of Paper Tape
Next, dispense a piece of paper tape and cut it to the desired length. You want the tape to be long enough to cover the natural lashes but not too long that it touches the eyelid.
Step 3: De-Tack Your Tape
This step is crucial for the removal process. De-tack your tape by sticking it to the back of your hand or another surface a few times. The tape should be slightly tacky but not too sticky.
Step 4: Place Your Tape on the Tips of the Lashes
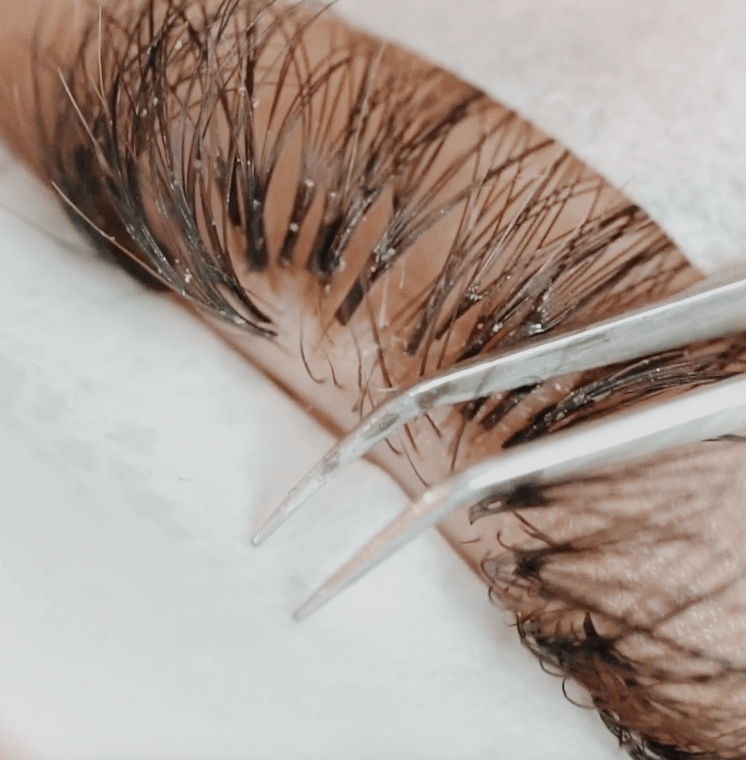
With the tape de-tacked, place it on the tips of the lashes from the front view. Try to only get the tips of the natural lashes to make for easy removal later.
Step 5: Lash Visible Natural Lashes
With the tape in place, you can now access the natural lashes more easily. Lash visible natural lashes using your preferred lash extension application method.
Step 6: Quick Cure Mist to Prevent Stickies
To prevent the lashes from sticking together, use a quick cure mist. This will also help the lashes to set more quickly.
Step 7: Gently Remove the Tape
After you have finished lashing the visible natural lashes, gently remove the tape from the tips of the lashes. Be sure to remove the tape slowly and gently to avoid pulling out any natural lashes.
Step 8: Repeat as Needed
If there are more natural lashes to lash, repeat the process by placing another piece of tape on the tips of the lashes and lashing visible natural lashes.
Conclusion
Taping back your client's lashes is a simple yet effective way to speed up your lash application time. By following the step-by-step guide above, you can tape back your client's lashes like a pro and save valuable time during your lash appointments. Remember to always de-tack your tape, use a quick cure mist, and gently remove the tape to avoid damaging any natural lashes.OutLash Extensions Pro
OutLash Extensions Pro is the ultimate destination for high-quality eyelash extension supplies designed for professionals in Canada. Our diverse product range includes lash extensions, adhesives, tweezers, and more, all made from premium materials for durability and longevity. Achieve stunning lash looks with ease using our easy-to-use products that will leave your clients coming back for more.